How to Send a Stripe Invoice from Your Phone
Today using ChargeStripe
There’s nothing more frustrating than seeing a missed invoice in your financial app after the fact. Even if you try to keep on top of things, inevitably, you’ll forget to send an invoice at some point. Instead of scrambling to make sure every invoice goes out and hoping your clients don’t forget, there are many ways to avoid that situation in the future.
To ensure it never happens again, this article will teach you why invoicing is essential and how you can send a Stripe invoice through text or email using ChargeStripe, a convenient way to send payment requests promptly.
Table of Contents
- Introduction
- What is a payment request for Stripe invoices?
- How to send a Stripe Invoice aka Payment Request with the ChargeStripe app
- Why use ChargeStripe’s payment request feature?
- What is the purpose of sending Stripe invoices?
- What happens when the payment request is paid?
- More questions about Stripe invoices
- Conclusion
What is a payment request for Stripe invoices?

A payment request (or a request for payment) is a hyperlink sent to the buyer by the seller to offer a safe and convenient way to pay for a product or service. The customer follows the link, enters their content and payment information, and sends the payment. In ChargeStripe, once you create the payment request through our app,, you can send the invoice URL through SMS, email, WhatsApp, or any other method that allows your end customer to access an internet browser and make the payment.
How to send a Stripe Invoice with the ChargeStripe app
The ChargeStripe payment requests feature allows you to generate a unique URL that you can send to your customers for payment. A customer can click on the URL to pay, and you will receive a notification once the payment is made. After this, the funds will arrive in your Stripe account. These payment requests are available for no additional charge.
So, how do you use the ChargeStripe payment request feature to send a Stripe invoice on your phone? If you are already a Stripe user, download the ChargeStripe app and sign in with your Stripe account information.
Then, the process is simple. Create and send a Stripe invoice in three steps:
- Create the link.
- Share it with your client or customer.
- Collect your payment.
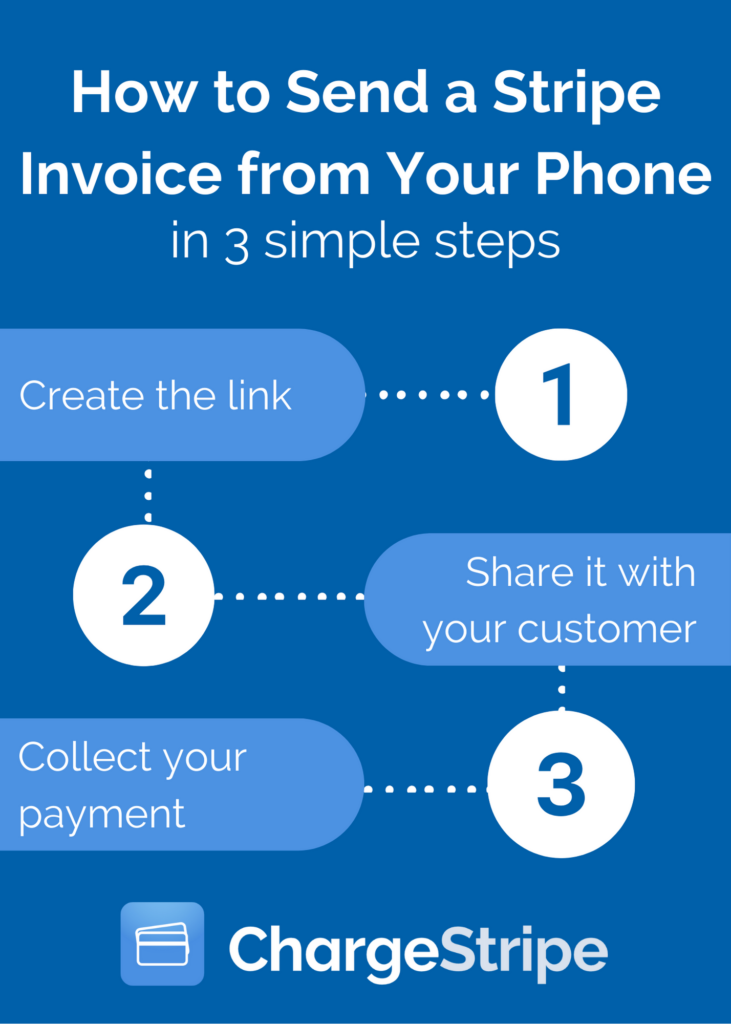
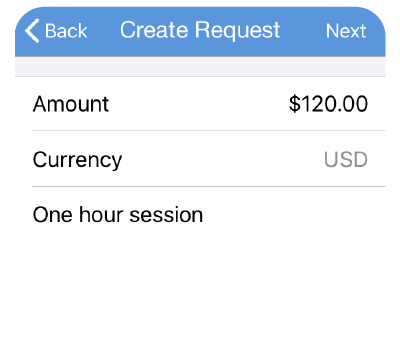
On the ChargeStripe app, you will find a payment request feature that you can use to generate a unique URL. You can send the URL through e-mail, SMS, or any messaging app on your phone.
If you do not have a Stripe account, you must set one up from the login screen after downloading the ChargeStripe app. You will be asked to fill in the following information:
- Business email address (this will be your login username)
- Physical business address (or home address, if you don’t have a physical business)
- Business phone number
- Social Security Number or Employer Identification Number
- Website or social media profile (just for verification. If you don’t have one website, you can step up a Facebook business profile)
- Name
- Home address
- Birthday
- Last four digits of your Social Security Number
- Banking information (where Stripe will deposit your payments).
Check out our blog on How to Not Get Your Stripe Account Rejected to ensure your account is accepted and does not get disabled later on.
Why use ChargeStripe’s payment request feature?
If you are looking for a way to send invoices to your clients and customers through your phone, ChargeStripe is the simplest solution for merchants who:
- Sell products/services where you don’t collect payments in real-time (contractors, therapists, trainers, etc)
- Don’t have a website or online payment portal to pay through
- Collect payment for products, services, subscriptions, donations, etc.
- Are looking for a no-code solution
Now, let’s answer a common question.
What is the purpose of sending a Stripe invoice?

In the most basic sense, sending an invoice offers a sale record so you can get paid by your clients. But invoices also serve other purposes which aren’t as apparent. These are a few key purposes of sending Stripe invoices:

1. Tax Filing
Your Stripe invoices are like receipts and provide documentation that helps confirm the information you provide on your tax filing every year to the IRS. All small businesses should keep daily records of every transaction, including your Stripe invoices. The IRS has detailed recordkeeping recommendations if you’re unsure how to start.

2. Legal Protection
Stripe invoices protect your business from false lawsuits because they provide details of the products or services you provide to your clients and a timeline of the completed work. Invoices also provide records of the agreed-upon amount with the customer to pay you for your goods or services, and these signed Stripe invoices can serve as a legally binding contract.

3. Bookkeeping
Stripe invoices record all of your sales and are perfect for keeping track of sales as a part of your bookkeeping strategy. They also provide documentation of your business’s financial history and track the revenue stream through your sales. Invoices also gauge your business’s profits and cash flow.

4. Marketing
Sending invoices through Stripe helps you devise marketing strategies for your businesses. You can use your invoices to pinpoint peak times when your products or services are most in demand and determine the most and least popular items you offer.
For example, if your business offers Shopify SEO services and Google Console services, but you find SEO services are the most popular. You’ll want to rework your marketing efforts either by boosting your ad spend on Google Console services or pivoting and expending more resources on what works best.
Once you identify key customer spending trends, you can develop marketing strategies based on this data to grow your business.

5. Tracking inventory
Stripe invoices can help track your inventory and predict future needs based on your past sales if you keep inventory in your business. You can use software to automatically track your inventory based on your invoices or develop a manual tracking system.
So, sending Stripe invoices provides a great way to keep records of your invoices, protect you from potential legal disputes, and bolster your marketing efforts. Now, let’s look at when you should invoice your customers.
Should you invoice a client through Stripe before or after you provide a product or service?
You send invoices to your customers to notify them to pay for the product or service, but when you decide to do it is up to you. Some businesses prefer to invoice upfront, some prefer to invoice only a deposit upfront and full payment at the end, and others like to wait until the end to invoice in full.
Of course, this depends on what you provide. For example, if you sell home goods in your store and have the product in stock, you’ll sell that product to the customer on the spot. However, the choice isn't as straightforward if you offer a recurring subscription, an out-of-stock product, or a service like window cleaning.
No matter what, your customer shouldn’t pay you before you send an official Stripe invoice.
Send a Stripe invoice before you provide the product or service.
Invoicing upfront ensures a healthy cash flow because you know how much you will make from a product or service. It also:
- safeguards against a customer’s inability to pay, should you provide the service upfront
- guarantees that money won’t run out before a project is complete.
This being said, invoicing upfront isn’t always the best approach.
Send a Stripe invoice after you provide the product or service.
Depending on your business model, invoicing after you provide the service may be the best approach. Ideally, once you complete the service, you’ll send the invoice immediately or opt to invoice during the customer’s pay periods, whether it's the end of a two-week cycle or the month’s end.
Invoicing upfront before you give the customer the product is the best way to go if you provide a product in stock.
As there’s no law governing the time to issue invoices, let the customer decide when the invoicing is best for them. This way, you prevent potential mishaps and miscommunication and ensure prompt payment.
Once you determine when you should send the invoice, the question now is,
What happens when the Stripe invoice is paid?
When your client or customer fulfills the payment request, you will receive a notification and can follow your payment status through your regular Stripe account. If this is your first transaction, it can take up to 10 days for the payment to appear in your account. However, if you’ve already processed payments with your Stripe account, your money will be deposited in 2 or 3 business days.
More questions on Stripe Invoices
How to create an invoice in Stripe using ChargStripe
Using the ChargeStripe payment requests feature, you can generate a unique URL to send your customers for payment. Once the customer pays using the URL, you will be notified. After this, the funds will be deposited in your Stripe account. These payment requests are provided at no additional cost.
Are there any limits on Stripe invoices?
No, ChargeStripe doesn’t limit the number of payment requests you can make.
Can I create various Stripe invoices with ChargeStripe?
Yes, you can create more than one invoice per customer with ChargeStripe.
Can I send a Stripe invoice to anyone?
Yes, you can send a Stripe invoice to anyone using ChargeStripe.
Conclusion

Your business needs a payment gateway. The best way to set up a payment gateway is with a third-party provider like Stripe using ChargeStripe.
In addition to providing a secured payment solution to your business, you can use our Stripe API in your mobile apps to send unique URLs that customers can click on to pay for their purchases.
Are you ready to use ChargeStripe to invoice your clients and customers by just using your phone? Download the app for free on iPhone or Android:
Need more help or have suggestions?
If you’re already a ChargeStripe user, we want to hear from you! Tell us about your experience using the payment request feature on the app, which features you liked the most, and which ones you’d like to see us add. Leave us a comment below, or send us a message by clicking the blue chat icon in the bottom right corner of your screen.